THE BLACK RIVER VALLEY MODEL RAILROAD WEB SITE
Pennsylvania E8s #5713 and #4121
After collecting a series of Pennsylvania passenger cars over the past year or so I decided it was time the BRVRR had a Pennsylvania passenger diesel to pull them in addition to my grandson's K-4 Steamer. The following photos and descriptions are how I made the decsion a reality.
I have had an A/B set of Proto2000 E8 locomotives in Atlantic Coast Line, blue and yellow livery, sitting on the shelf for quite some time. I originally intented to turn them into another set of NYC passenger locos, but changed my mind and proceeded as follows.
unfortunately I didn't take a photo of the body shells before I stripped them of their original blue and yellow paint by soaking them in a bath of 91% Isopropyl Alcohol for six or seven hours. The paint just sluffed off in large pieces when I lightly brushed them under a stream of water. It was the fastest and best stripping job I've ever accomplished.
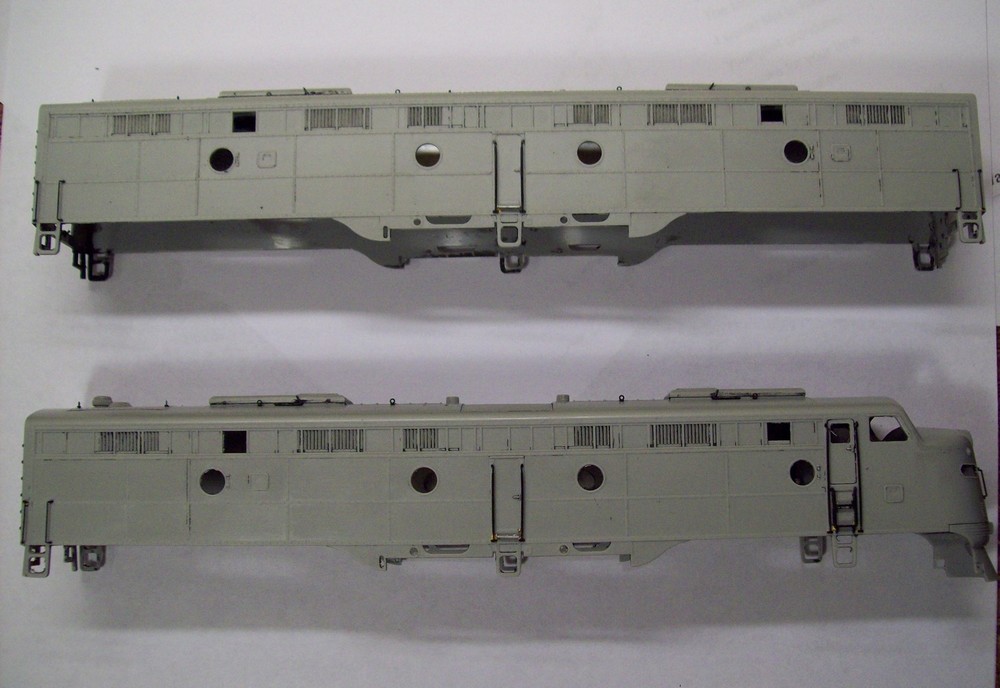
After washing the body shells in mild soap and water and allowing them to dry overnight, I rmoved the front access door with the headlight opening on the A-unit. I fabricated and installed a solid replacement with .030-inch styrene. When the cement on the new door had dried thoroughly I primed the shells with a light coat of Testors Flat Light Aircdraft Gray paint as shown above.
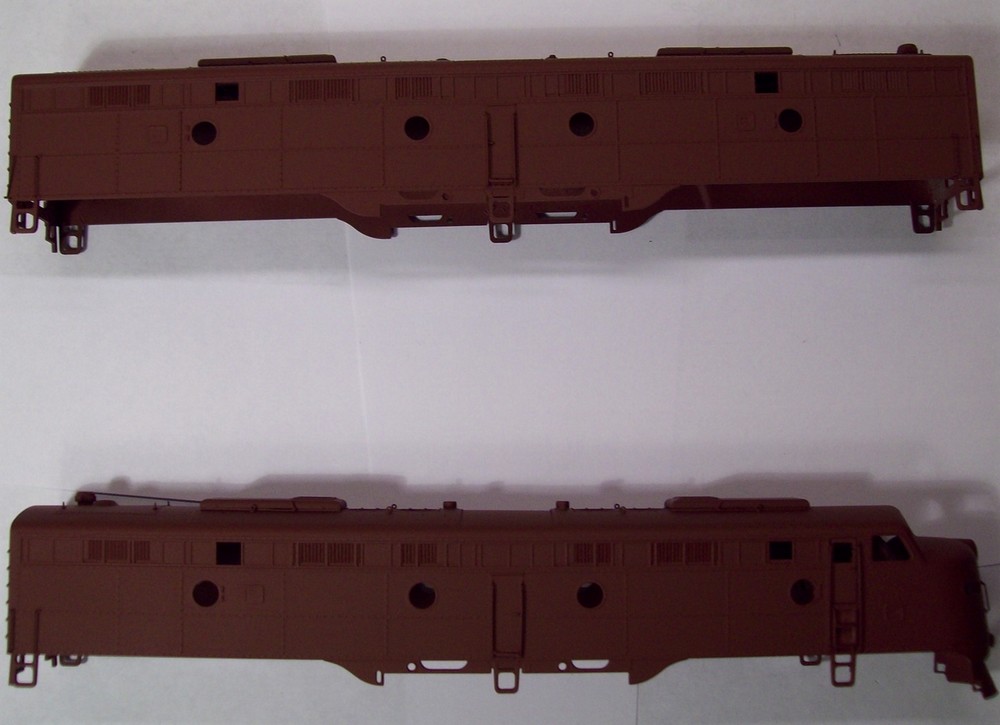
After the Light Aircraft Gray primer had dried overnight, I sprayed on a couple of light coats of Floquil Tuscan. When the Tuscan Red had dried I had two E8 body shells ready for decals and detailing as shown above.
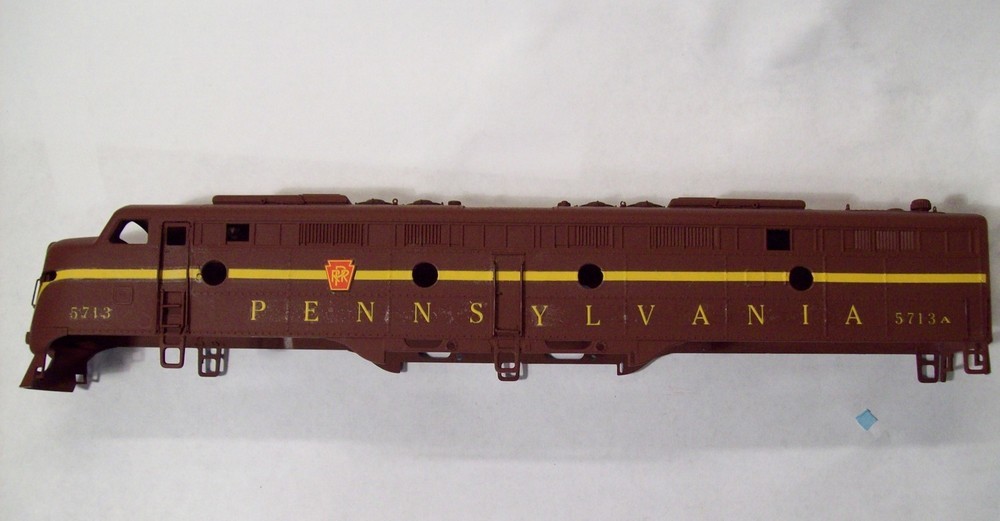
I used Microscale Decal sheet 87-810 to transform my loco shells into Pennsylvania passenger locomotives. The Tuscan paint dried with a 'flat' surface as can be seen above, and made getting the decals 'lay down' a tedious process. Numerous applications of Walthers Solvaset finally did the job. Note: Before I tackled the B-unit I gave both sides a light coat of Testors High Gloss Clear Coat to smooth out the surfaces before I applied the decals.
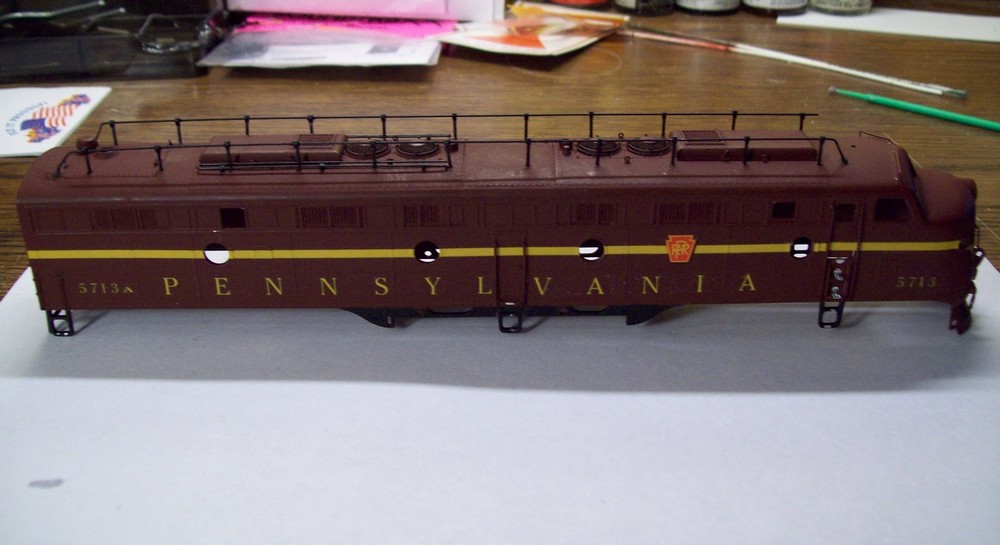
After the decals had been applied and sealed with a couple of light coats of Dull Coat I reinstalled the cooling fans and the windshield, window and port glass. Next I fabricated the locomotive radio antenna from the stanchions from an Athearn BB SD40 kit and a few lengths of .-15-inch music wire. Each of the stanchions was cut to length prior to application and held in place with a small drop of 'super glue.' The music wire was then threaded through the loops at the top of the stanchions and secured with the same adhesive. I fabricated the towing eyes on the front of the locomotive from .030-inch styrene and applied them to the front of the locomotive just above the anti-climer. I hand painted them with a couple of coats of Floquil Tuscan. When everything was dry I painted the antenna, ladders, MU and air-hose and shell skirt by hand with Floquil Locomotive Black and a small brush. I applied several coats of Bragdon Enterprises weathering powders to the body shell and to the locomotive trucks. When done a light coat of Dull Cote sealed everything into place. The results are shown above. NOTE: I followed the same general procedures with the B-unit #4121. The major differences were the application of a clear coat to make decal adheasion better and the lack of a locomotive antenna.

The chasis for the Proto2000 E8s is quite robust. For the A-unit, #5713 i installed a new headlight arrangement and an MRC Sound Decoder and a Soundtraxx #810112 Oval Speaker. To do so I first removed the stock circuit board from the rear of the chassis and installed a flat piece of .030-inch styrene in its place. Next I cut down the engineer/fireman section of the interior piece and installed a 12-16 vold grain of wheat bulb in place of the originals. I mounted the decoder on the rear of the chassis with double sided tape and routed the wires for the headlight and speaker forward in the groves cast into the chassis weight. I fabricated a speaker enclosure from .030-inch styrene and mounted the speaker in it. It is visible, top right, with the wires leading to it.
After attaching the speaker enclosure well forward in the body shell with double-sided tape, I put the shell on the chassis. Everything went together without interference and the result can be seen above.
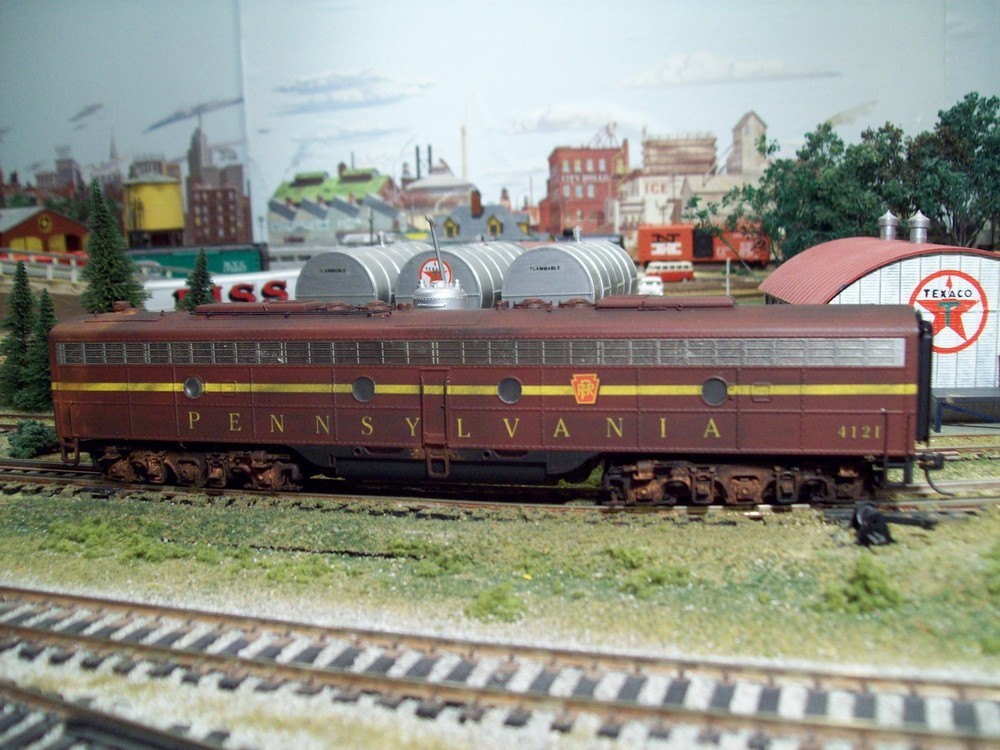
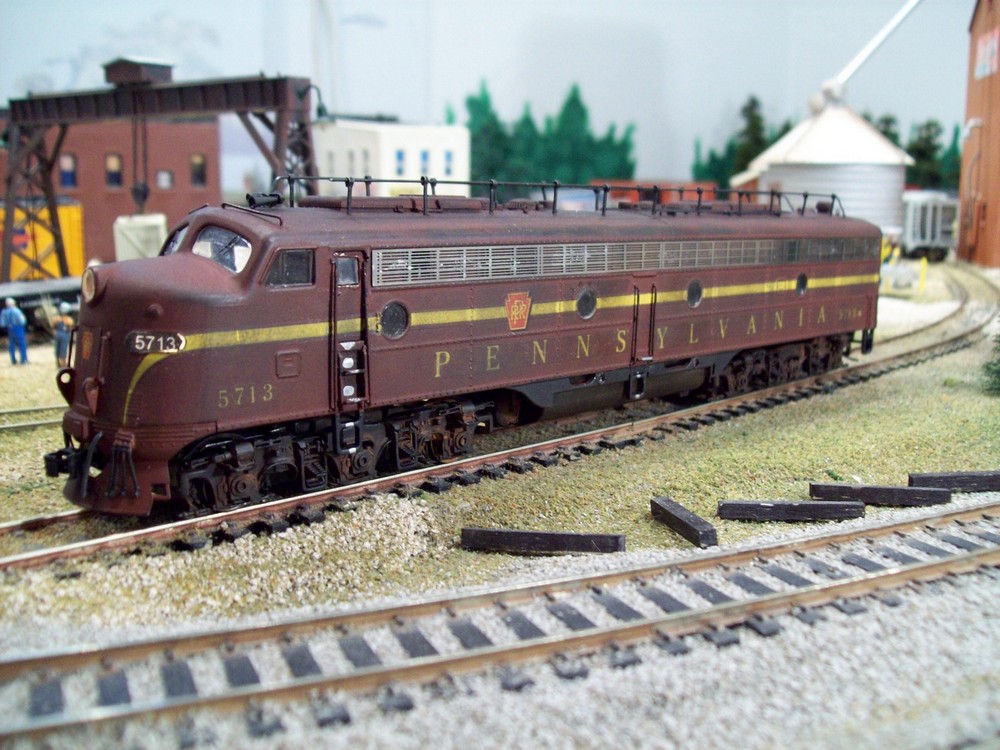
This is Pennsylvania E8B #4121 after completion. I followed the same general procedure with this locomotive as I did with #5713 above. The locomotive is powered and controlled with a Lenz decoder. It has been matched to #5713 and the two of them run quite well together. They handle our 8-car heavyweight consist without any trouble.
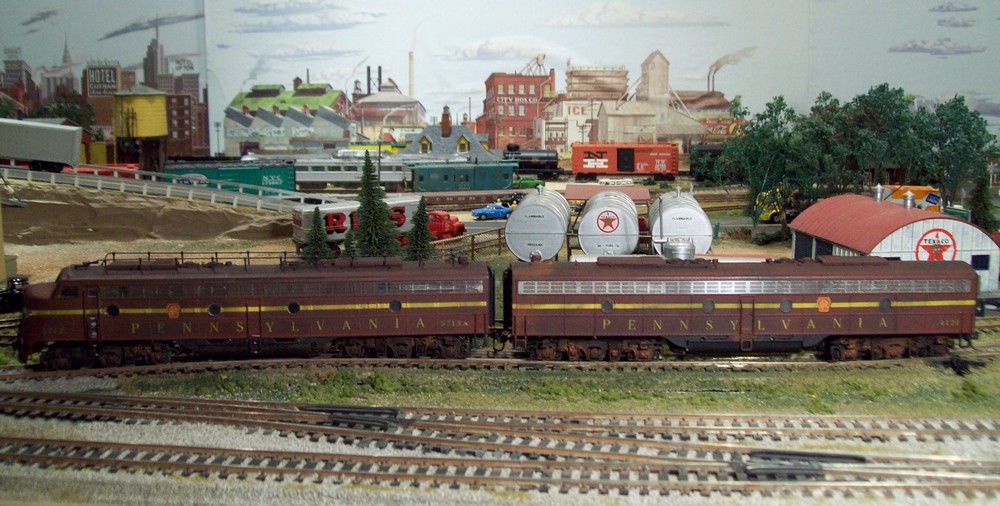
Here are my two Pennsylvania Passenger locomotives posed on a BRVRR siding for a photo shoot. I am quite pleased with the results of this little project and look forward to a few more similar ones in the future. Hope you enjoyed my little how-to.